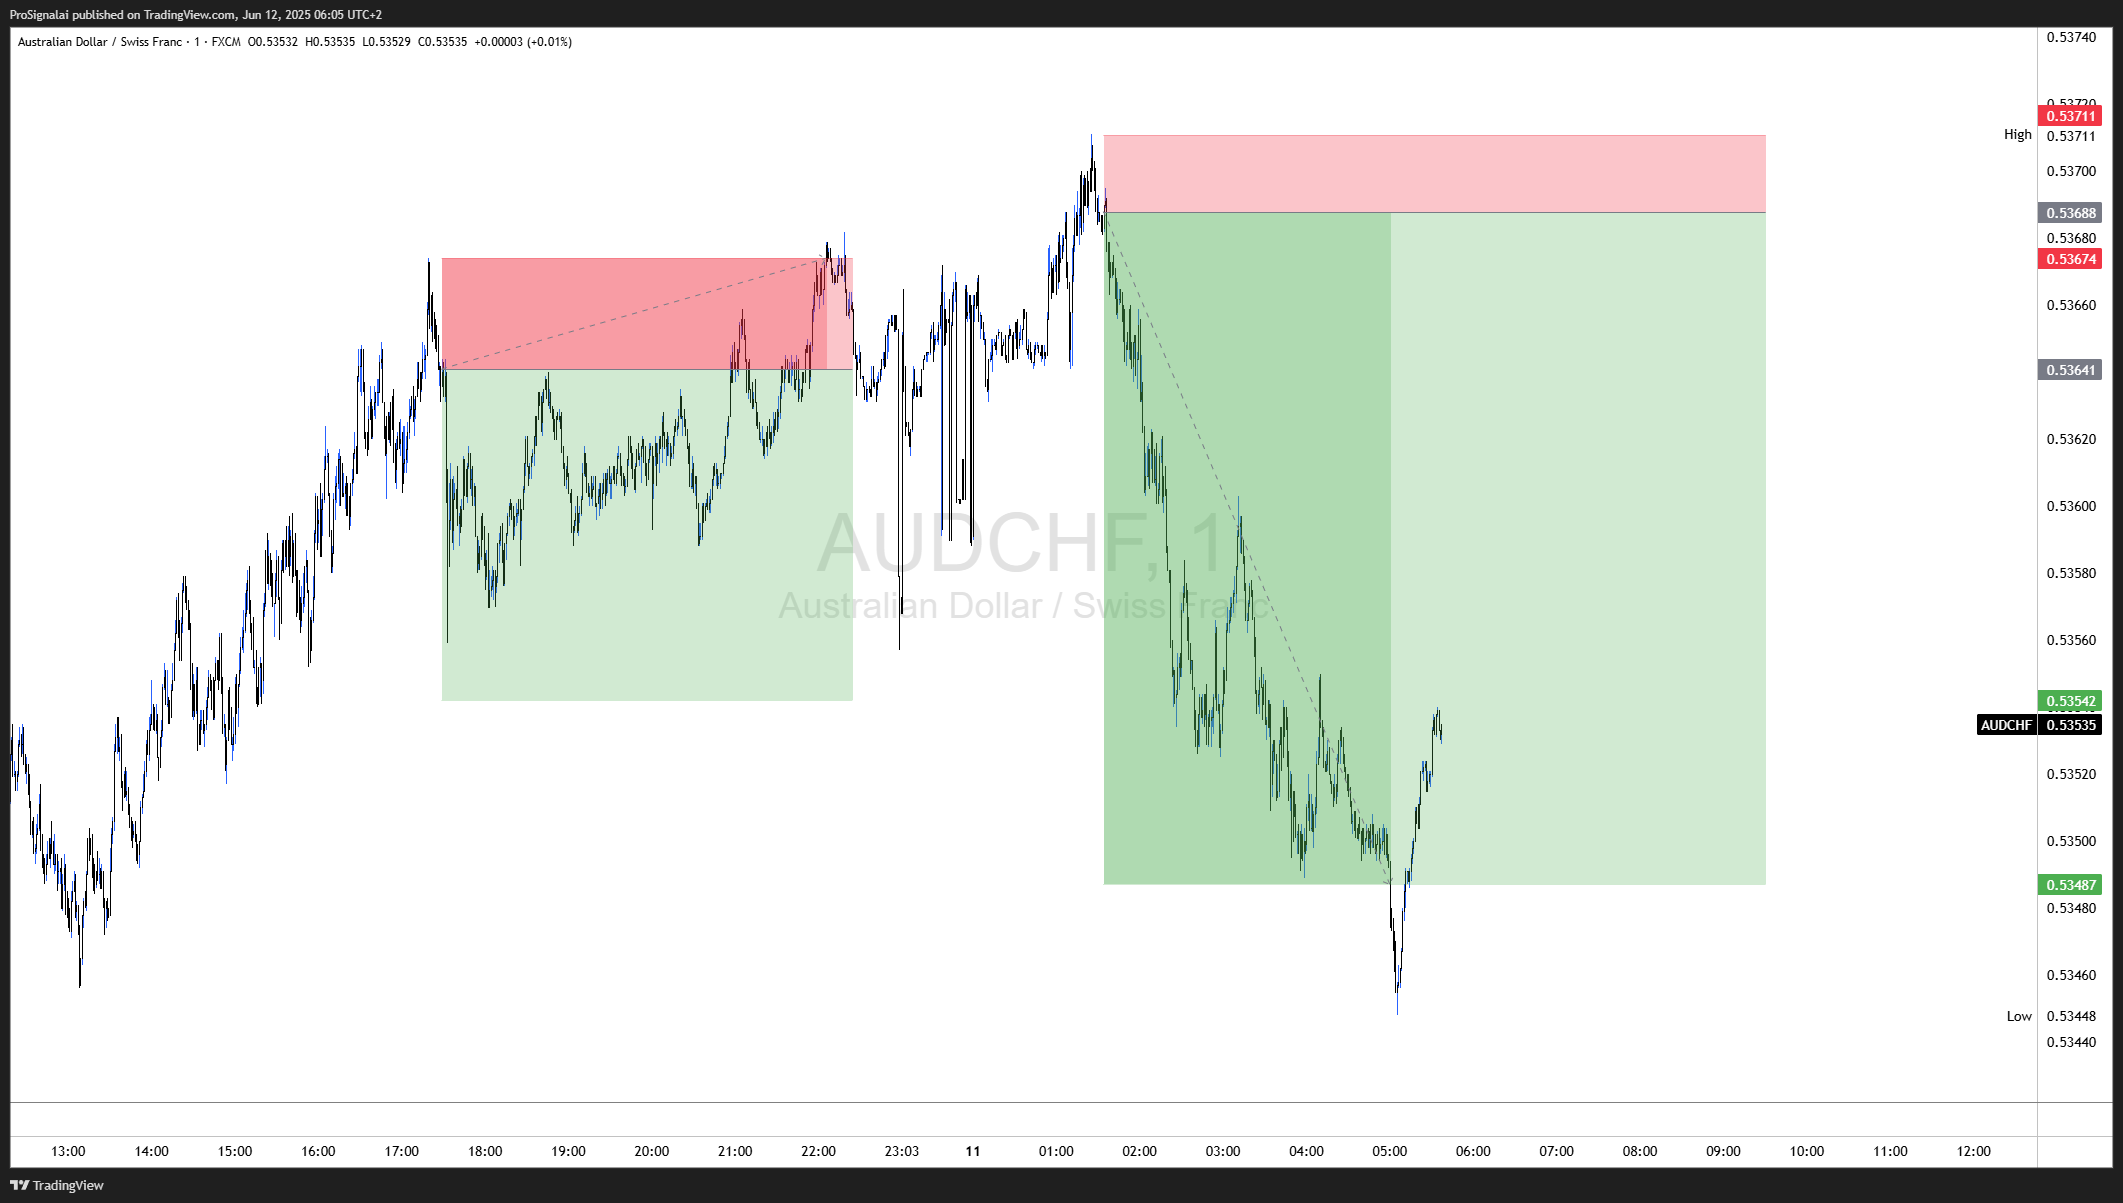
🔹First Trade (Left Zone)
-
Entry: Initiated right after a liquidity grab above the previous high in a supply zone (highlighted red).
-
Confirmation: Bearish price action formed a sharp rejection wick followed by lower timeframe structure break, indicating institutional selling.
-
Trade Logic: Short from the premium area after smart money reversal, riding the correction back into a demand imbalance zone.
-
Result: Clean drop into the green zone (TP area), hitting target with minimal drawdown.
🔹 Second Trade (Right Zone)
-
Entry: Similar setup – liquidity sweep above a short-term high into a fresh supply zone, followed by impulsive rejection.
-
Trigger: Confirmation with change of character (CHOCH) and strong bearish momentum candle.
-
Execution: Short position opened from the top of the supply zone, with a tight stop just above the sweep.
-
Result: Steep decline straight into the defined take-profit zone, aligning with prior demand and discount pricing.
🟩 Risk Management & R:R Handling
Both trades were planned with tight stop losses placed just above the supply zones, and targets at key liquidity levels or demand areas. This allowed us to achieve high reward-to-risk ratios, estimated well above 3:1 in each case. The setups were executed with a smart money methodology, minimizing exposure while maximizing potential gain. Managing risk this way ensures long-term edge and sustainability in trading.

